Creating and processing your batches is the bread and butter of any wine club. This is where it all comes together—just select the memberships you want to process and ship.
In this article
Before you start
To help ensure processing your club goes as smoothly as possible, here's a some things to check first:
Review the Bloom Selections Report in Bloom/Reports/Selections. This will give you an idea of how much wine you'll need for your upcoming batch. Then, ensure you have enough inventory to complete the batch sales.
Check that your wine club member emails are updated correctly. Find the Settings tab in Bloom and open the Email sub-menu. Scroll down to the Email Text section and double-check the following:
Successful payment for pick up order
Successful payment for shipped order
Failed payment for order
Archive all old processed batches and delete any saved batches you are no longer using. A member with a Failed Payment in a processed batch will not be included in a new batch. The same goes for a member in a saved batch.
Finally, take a moment to consider how you would like to organize your batches. Review the article Batches Explained if you are unsure.
Building a batch
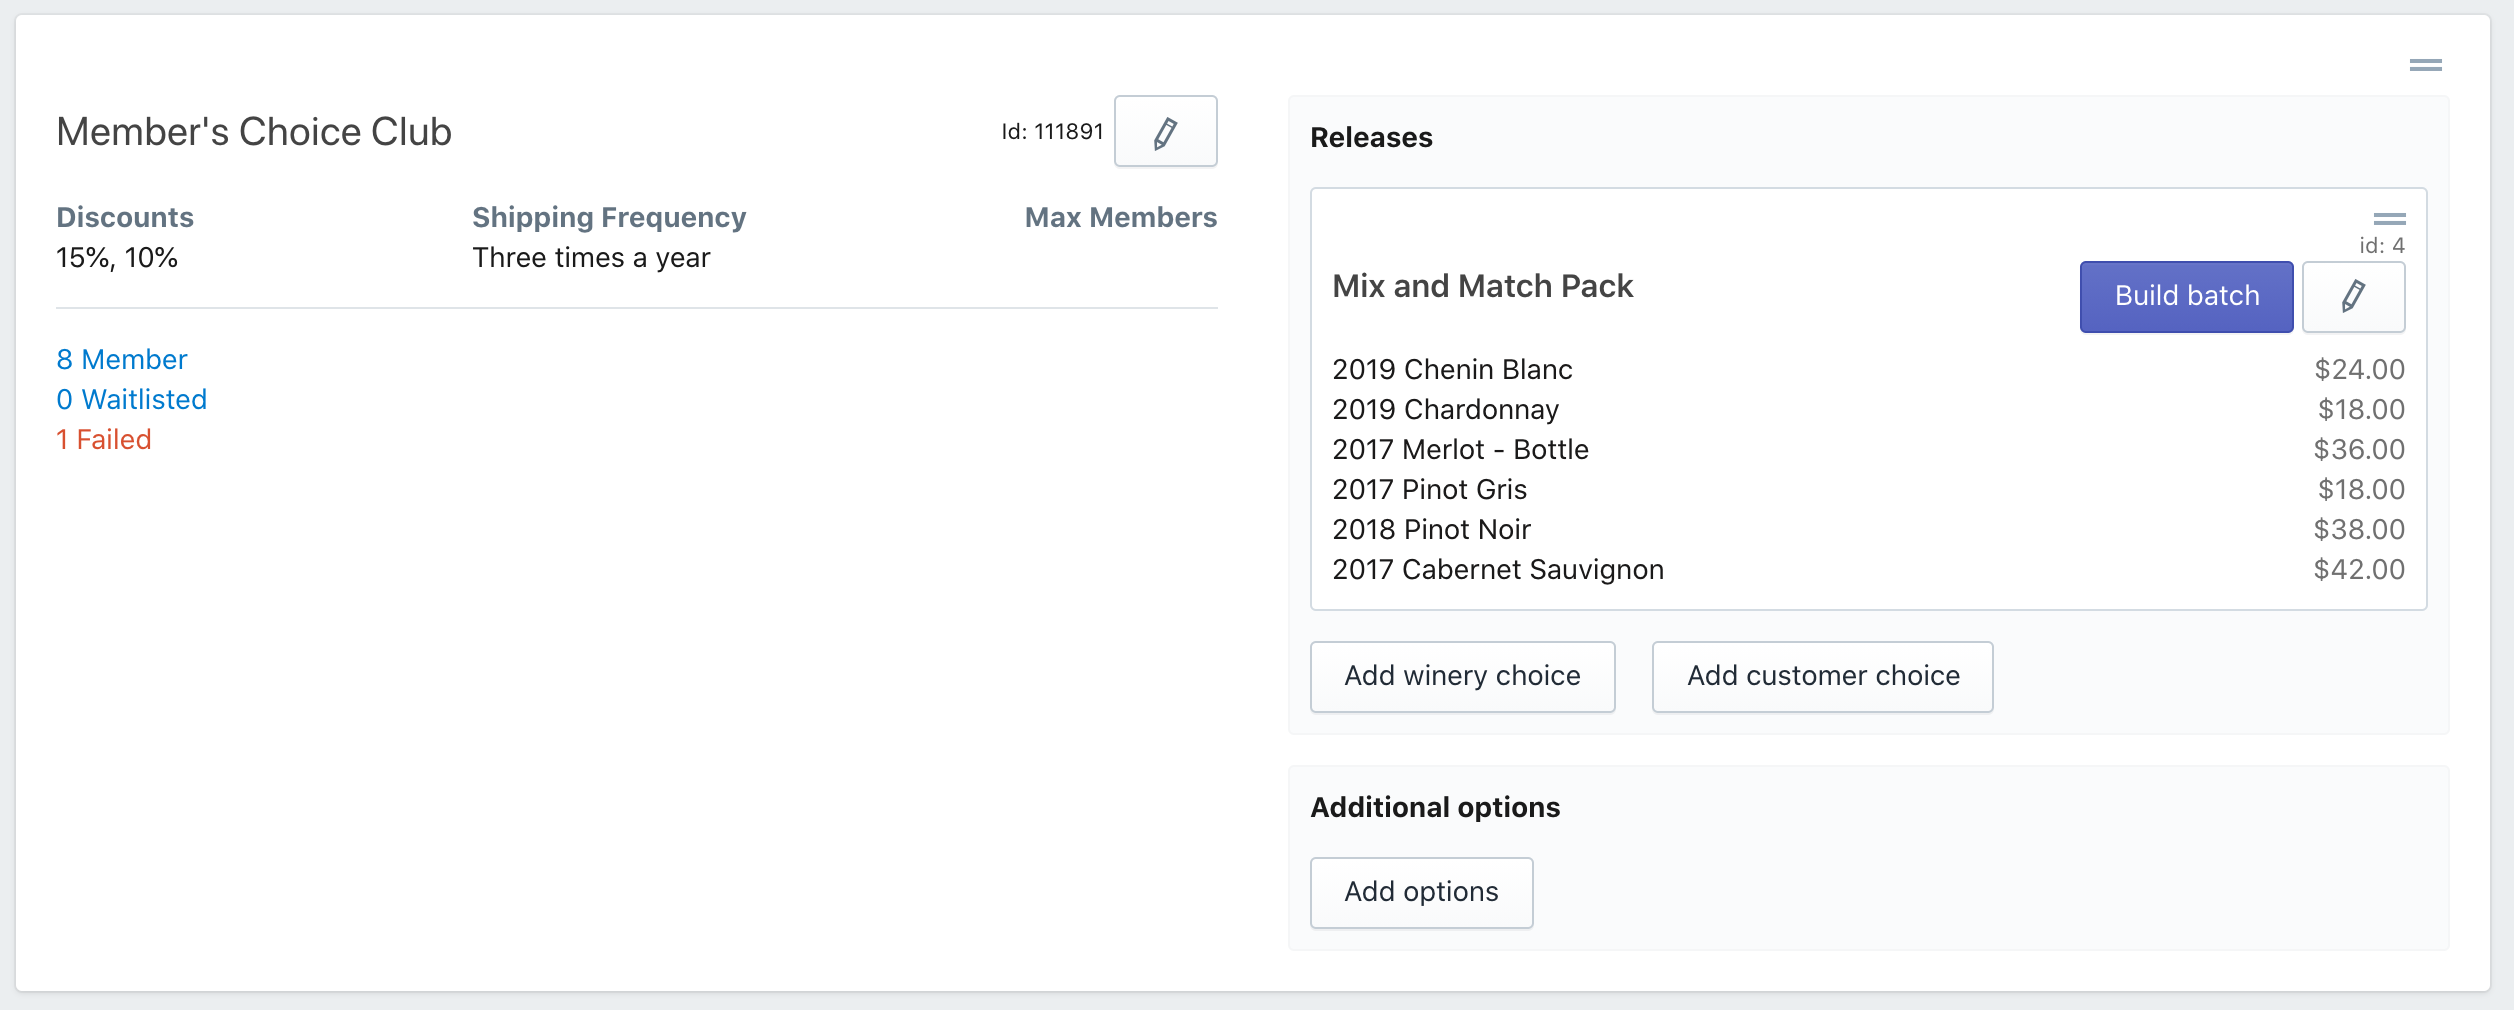
To make this easier on you, Bloom creates batches on a by-release basis. Releases help to organize your members by which wines they'll receive. Running one batch of all members would create a lot of complexity, and that's not how we roll.
To start building batches, go to the Clubs tab in Bloom. Click the Build batch button to process a release.
Selecting memberships
Once you are on the Build batch screen, at the top of the page you will see a notification stating if any members have failed payments or are in saved batches. This provides a convenient reminder to:
Make sure you've handled any failed payments
Review any batches you've already saved
Next, you can either start selecting members or filtering by fulfillment type. Filtering your members by their fulfillment type is an easy way to separate shipping orders from pickup orders. You can also sort you members by membership notes and processed dates. This allows you to quickly find any members you might want to remove from the batch.
Once you have finished selecting members, name your batch before continuing. Naming your batch will help you keep track of your progress in the batching process and to reference the batch later. Most users will name the batch with the club name and fulfillment type.
Selecting wines
If you selected a winery choice release to process, Bloom will ask you to select the wines you want to send your members. You will have a drop-down menu for each wine option that will be in the shipment.
If you are a member choice club then this step is skipped and you'll be directed to the confirmation page.
Confirming quantities, inventory and shipping rates
Last, double-check the quantities of each wine that you'll be sending. If a there is more wines requested than inventory available for a wine it will be highlighted in red. When you are using flat rate shipping or your online store shipping rates they will also display here. Take a minute to make sure they look correct.
Once you are sure you're ready to proceed, click Process orders.
Once you click Process orders, payments will begin processing in the background. This can take quite awhile for large batches—about 6-7 seconds per order.
Reviewing your processed batch
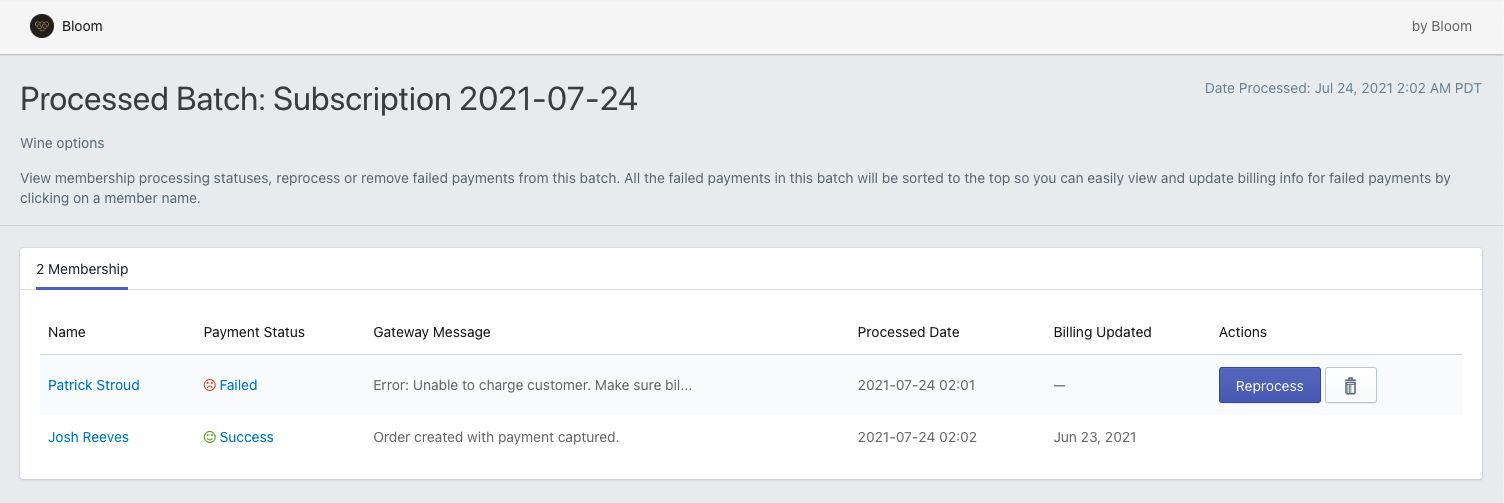
Once the batch has been processed you should review it for issues. It's normal to have some members with declined or expired cards. You can also inspect any other errors that might have occurred. It's a good practice to check back in on your batch the next day to see if any members with billing issues updated their information. This way you can complete their orders.
Once you are ready to start fulfilling orders, go to the Orders tab in Shopify. Here, you can handle your wine club orders just like you would any regular online orders.