If club members want to log in and manage their membership details, they will need a customer account. They have already had their email address saved in Shopify. Now they just need to associate a password with that email.
There is a good chance that club members already have an account. If they created their membership by signing up through the website, or if they activated their account when they received their first activation email, then they already have an account. When members don't respond to the first activation email they receive, then it is up to the winery to follow up with those members by resending the activation email.
There are two ways to send an account activation email. You can send an email to one customer at a time, or to many customers in bulk.
One customer at a time:
Log into Shopify and navigate to the Customers tab
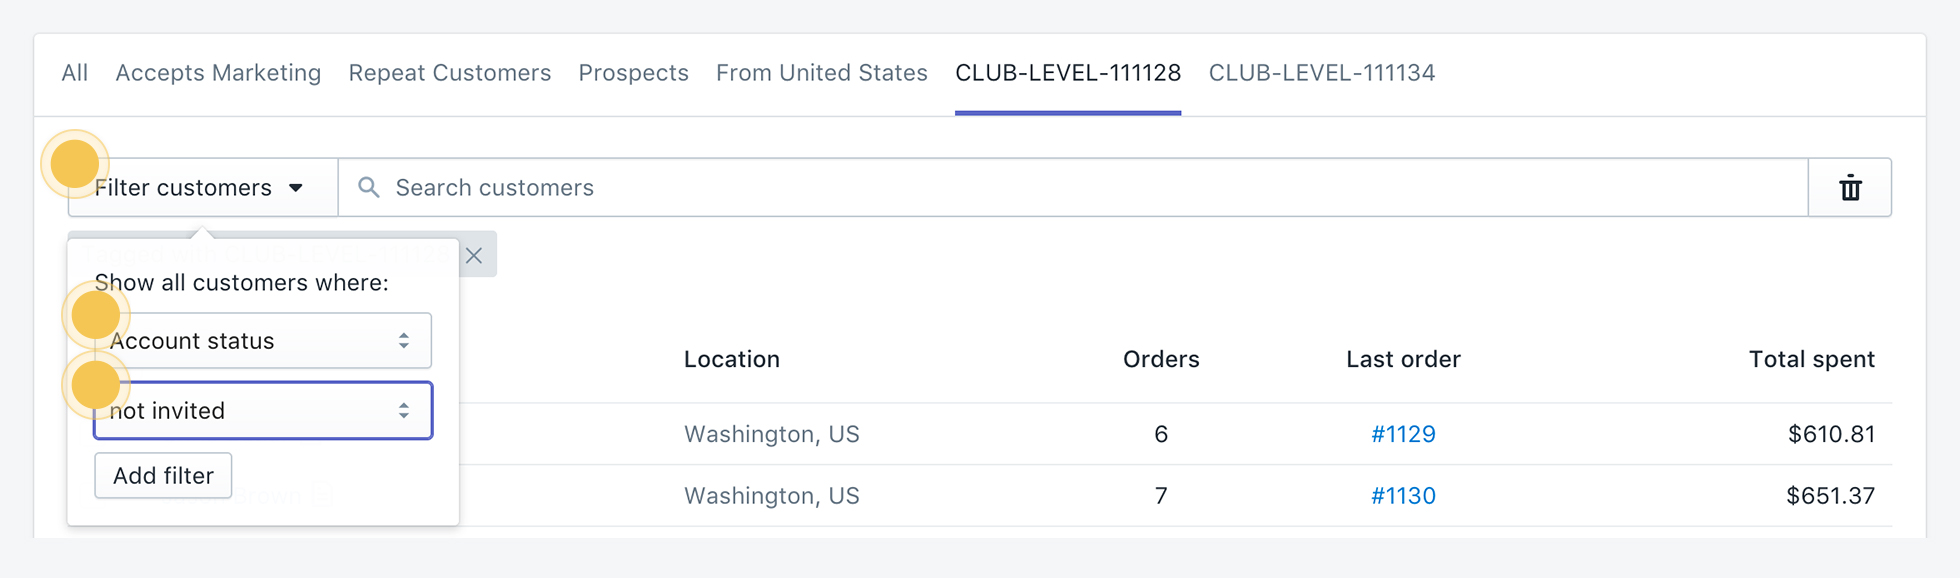
Find the customer you want to send the activation email to. You can filter your customers to customers who haven't been invited to set up an account using Shopify's filtering tool.
Click on the 'Send account invite' button under the customer's name.

Fill out the form, preview the email and send it directly to the customer.
Send to many customers in bulk:
There are times when you have many members that you need to send account activation emails to. In this case, you can use Shopify's Bulk Actions feature on the Customers view.
Log into Shopify and navigate to the Customers tab
Next you'll want to filter your list down to just club members. Click on the saved search tab for the club level you want to send invites to. The saved search will be named with the club level ID, like 'CLUB-LEVEL-111100'. How to find the club level Id.

Select the customers you want to send the activation email to. You can filter your customers to customers who haven't been invited to set up an account using Shopify's filtering tool.

Click the 'select all' check box. This will select all customers listed, up to 50 per page.
Once you've selected your customers, click the 'Bulk actions' drop down and select 'Send activation emails'.

At this point you should be directed to a processing view, showing you what emails are being sent. You can leave this view since the emails will continue to send in the background.
Notes: You can only send 50 at a time. If you have more than 50 members in your filtered view, send the emails a page at a time. Be careful not to resend to the same page -- keep track of what pages you've already sent.